Showing posts with label SRM Stickers. Show all posts

Saturday, August 10, 2013

Great Impressions Guest Designer

I am so excited to be guest designing for Great Impressions this month!

I made two cards with these adorable stamps! I definitely could have kept going because I had so much fun! For this first card, I used watercolor pencils to color the image. For the sand, I masked the penguin feet and then blended a couple colors of ink to create variation. Next I used a mask and a slightly darker ink to add the dots, which I then embossed with opalescent clear embossing powder to create a little bit of glimmer, which doesn't show up very well in this photo. Additionally, I added glossy accents to the inner tube, sunglasses and bow, which also doesn't show up well in this photo.


Supplies:
Faber Castell watercolor pencils
Clearsnap inks and embossing powders
Ranger Glossy accents
Crafter's Workshop stencil
SRM stickers sentiment
Studio G brad


For this card, I wanted to make the image stand out from the rest of the card, so I fussy cut it. I colored this one with watercolor pencils and alcohol ink markers. The double frame really sets off the image.


Supplies
Bazzill Cardstock
SRM sticker sentiment
Faber Castell watercolor pencils
Prismacolor and Copic markers
Spellbinders dies
Glitz and Carta Bella papers
Clearsnap ink

Saturday, July 27, 2013

Joy's Life Summer in 3D blog hop


Welcome to the joy's life summer in 3D blog hop!

I made a 3D flower for my project! I used a punch to create this gorgeous flower.


Here is a close-up on the stamp

I stamped on a Maya Road transparency with some Clearsnap Chox ink using this fabulous Joy's Life stamp from the new My Hero set!

Supplies: Wooden leaves: Prima, paper: My Mind's Eye and Lily Bee, Sticker stitches: SRM, flair:Studio Calico, Cardstock: Bazzill, Ink: Clearsnap, Transparency: Maya Road, Stamp: Joy's Life

If you didn't start at the beginning, you might want to hop on back there and check out all the inspiration and prizes to be had along the way. If you did start at the beginning, then HOORAY! you've made it to the end! now hop on back over to Joy's Life and tell her what a great time you had! 

Last but not least, I have blog candy!!  I honestly don't know what it is yet, but I will find something wonderful. So to be entered to win a surprise pack of blog candy, become a follower (or already  be one) and leave a comment below. I will pick a winner randomly next week.

Monday, June 24, 2013

Runway Inspired Card

I created this card for a friend who likes pink and sparkle. The Runway Inspiration was pretty much perfect for this! I happened to have scraps of this tiffany blue and silver swirl paper laying on my desk and I just took it from there.

Here is the inspiration

and here is my take


The cardstock is Coredinations. The sentiment sticker is SRM. The silver swirl paper is Recollections. 


Wednesday, May 1, 2013

Clearsnap, Susan Weckesser and SRM Glassine bag

I had so much fun working with the Susan Weckesser products from the swap, that I made another project! For this one, I used a Glassine bag from SRM stickers. 


Clearsnap Product: 

Other Supplies:
  • Susan Weckesser for Unity Stamp Company
  • Susan Weckesser "Live In Color" Patterned Paper by Want2Scrap
  • Felt Flowers from Buttons Galore
  • Hero Arts sentiment stamp
  • Helmar Foam tape


Thursday, January 10, 2013

Altered Candy Bag with Joy's Life

This week Joy asked us to share some new products. I just won these Glassine bags from SRM stickers in a pre-CHA giveaway, so I thought I would try them out. I created this little candy bag using the largest Glassine bag and a strip of Teresa Collins patterned paper.


I used the You are a Treasure sentiment from the Joy's Life You're so Punny set and created a treasure chest tag with my Cricut and the Life is a Beach cartridge.
The gems are My Mind's Eye. The Ink is Clearsnap. The ribbon is May Arts. The punch is Fiskars.

Wednesday, May 23, 2012

Cricut Purse with Chocolate Graduation Gift!

Happy Birthday to me, Happy Birthday to me!
Yep, it's my birthday, but Im not telling how old I am. ;)
Haha, how funny is that? I always wondered why women didn't want to tell their age. Now I finally get it! 

Anyway, here is a graduation gift project that I created for the Joy's Life Design Team blog. I used my cricut to cut the bag, tag and label. The bag and tag are from - lol - the Bags Tags Boxes and more cartridge. The label is from the Lacy Labels cartridge. Fitting right? The papers are Jillibean Soup. The sticker on the tag is SRM. And of course, the stamp is Joy's Life!
Here is a closeup of the stamp. It is from the new Tag You're It TWO set.

Other supplies: Bazzill Cardstock, My Mind's Eye rhinestones, Doodlebug Sequins, May Arts ribbon, button from Hydrangea hippo kits, postage stamp frame from Maya road.

Monday, May 7, 2012

CAS Rainbow stamped Clearsnap card

I made this card for my husband's grandfather's 91st birthday. I used the Hero Arts Zig Zag thanks set for the chevron design. To create the rainbow color scheme I used the Clearsnap ColorBox Full Size Pigment Inkpad in Primary. It's a rainbow ink pad. So I just carefully applied the ink so that I used just the red orange and yellow for the first stamp. Then I applied the green blue and red, but went over the red section with one of my purple cat eye inks for the second stamp. The hardest part for me was lining up the chevrons   correctly. The sentiment sticker is SRM.
This card is for the CAS-ual Fridays birthday challenge. Also it is for the Simon Says Stamp birthday challenge and the Hero Arts birthday challenge.

Monday, April 16, 2012

Christmas themed tube set from altered box with cricut and joy's life stamps

This week Joy asked us to work with these tubes! I had my Christmas supplies out and spread all over my work room because the magazines all have their holiday calls out and I was working on stuff for that. So, I was inspired to make my tubes Christmasy. 


BUT I used a Halloween Stamp set stamp! Isn't that cool?! I love it when I can make my supplies do double duty!


Speaking of supplies doing double duty, the box that I altered here is from some webster's pages pins packaging. I often save plastic boxes like this one to alter. You could make a tube holder like this out of cardstock, but I like the plastic one because it is more sturdy, especially once the tubes are filled with candy.


To make the holes for the tubes, I just used a punch in the same size as the tubes. Or as close as I had really, mine was scalloped and just a hair too small, but I managed to shove them in there anyway.
The label die cut is from the Lacy Labels Cricut cartridge. I covered up the bird that was at the bottom of the leaf circle, with some holly leaves that I sketched in pencil and then cut free-handed.
I used Staz-On ink, but only inked it lightly so that it worked with the distressed My Mind's Eye papers. The bling is also My Mind's Eye. I used a little bit of Clearsnap ink on the edges of the box so that the white cut edges of the paper didn't show.
The stickers on the accordion flowers are from SRM stickers.

Wednesday, February 29, 2012

First Paper Crafts publication!

My first publication in Paper Crafts magazine is out! You can find my card on page 45 of the March April issue, available on newsstands, your local Barnes and Noble (but not mine since they were sold out) and anywhere else crafting magazines are sold! You can also buy it online HERE.

and here it is:

Im so excited! Of course I already have a copy - two actually (one from being published that came with my returned card, and the other from my subscription) - but I am still so excited to see it for sale in a store! So far I have been striking out with finding it, but I have it on very good authority that it's out there!

Tuesday, January 24, 2012

Hello Friend card

For this card I was inspired by the inspiration challenge for this week at Ruby Rockit. I always love the way paper collections look when they are all laid out together. So I was inspired by the part of the image where the different papers are all together. I chose a collection that I had a bunch of scraps from and used a small square punch for the Create Magazine punch challenge - to cut squares from all of the coordinating papers, then I glued them down in a pattern.Finally I used my sewing machine to sew a zig zag pattern across them.


The paper on my card is Crate Paper restoration (oh how I loved that line!) the stickers is SRM stickers, the pins are jillibean soup and little yellow bicycle. The trim is may arts.

Wednesday, January 11, 2012

7th Birthday card

For this card I used the sketch from Ruby Rock-it. Check out their contests over on their blog!  I used sketch #1.


To create this card I used Jillibean Soup papers and sticker, SRM sticker sentiment, my cricut to cut the 7, and some twinery twine.


I was also inspired by the Moxie Fab Tuesday trigger for this week. I was inspired by both the numbers and the quilting. I used my sewing machine to 'quilt' the 7, and add some sewn borders around the card panels.


Monday, January 9, 2012

Umbrella Digi Stamp

One of my new year's resolutions is to share a free digi stamp on my blog once a month. I enjoy drawing and making digi stamps. I LOVE sharing them. But I don't always make it a priority, so I figured that once a month is a good goal. It isn't something that really NEEDS to be a priority, but it is something that I enjoy.

So here is the first for this year. It's simple, but useful I think.


I used it on a card here for a paper piecing. I also used some Lily bee papers and an SRM sticker sentiment.

Saturday, December 24, 2011

Merry Christmas


I don't know why, but I just adore this card! It seems so unexpected, I guess, with the pinks and oranges and blues. These papers (and the button and chipboard) are Crate Paper, mostly Random, and some Emma's Shoppe. I cut the card and the snowflake with my Cricut, using the Damask Decor cartridge. The snowflake is part of the card, then I layered a pink cut, an off white doily cut, and a transparency with silver script.

The sticker is SRM stickers.

Wednesday, December 21, 2011

Hanukkah Cards


Happy Hanukkah!

Why are Hanukkah Cards so hard for me? I honestly don't know! The only thing I can come up with is the blue and silver or blue and gold color scheme, but that doesn't really seem to cut it as an explanation.

Here's one that I made a couple weeks ago. I thought it would be fun to make the candles out of ribbon with gems on top as the flames. But there seemed to be enough going on after I created the menorah, so I left it at that. And now, it just looks kind of juvenile don't you think?


This one I actually kind of like - notice that it has blue, but the blue is paired with browns and greens.

On this one I tried to 'copy' my success with the blues and browns, but it didn't work as well. I think because the sentiment is a slightly different shade of blue.
This one, a big part of the problem is the photo - that is for sure! This is from when my camera was really on the fritz. But still, this card just makes me shudder. Again, here, I am blaming two different shades of blue - the ribbon and the paper.

So, yeah, seriously looking for some ideas here as to why I can't seem to make a decent Hanukkah card to save myself! I mean, I guess if I had to pick a type of card to stink at - Hanukkah isn't such a bad one since there are less of them than pretty much any other type. But still, it really kinda bugs me! This year I FORCED myself to make a couple but I dread it because I know they won't turn out right.

Hmmm, I wonder if that has something to do with it? Dreading working on something is bound to stop up the creative flow. But how do you get around that?

Sunday, December 18, 2011

Playing with my Cricut


I've had my Cricut for a while now, but I never really bothered to 'get to know' it. Then I went to a crop and met a friend who showed me how to set the pressure to make it not chew the paper, and I wanted to give it another try. I got a few new cartridges and have been playing around ever since.
I have found that it is sometimes difficult to marry the cricut with my style of scrapping, but not impossible. It's also a sort of new way of thinking about my paper crafting. There are so many options with the cricut, and I can make them all match!

Here is a Christmas card that I created with the Damask Decor cartridge and some Crate paper and My Mind's Eye papers, and My Mind's Eye chipboard. The sentiment is SRM stickers.
The card is cut from Crate paper Random paper, and then layered with another cut of blue denim Random paper and the green print Random paper. With this card I ran into a little bit of a photography problem. I'd love some ideas if you have any on how to fix this problem. It happens whenever I have a window, or cut out like this.

I created the card so that the tree rests over the red polka dot paper, but when I went to photograph it, it wouldn't lie flat enough so really show that. I took the shot above with the card laying flat. Then the one below with it standing up. But you can see with both of them that you don't really get the full effect. The front of the card is askew from the back because it is slightly open in both photos.
And on a side note, don't you LOVE those SRM stickers? I wanted to keep the card simple, and I wanted to use the ornament, so I decided that putting the sentiment on the ornament was the way to go. I had to trim the stickers a little bit, and overlap them, but that's the beauty of these clear stickers - they still look GREAT!

Tuesday, December 6, 2011

The Nook Advent Calendar Giveaway


I'm so excited to share with you the Advent Calendar at My Scrapbook NookMyself and 24 other Nook friends are hosting a giveaway during the count down to Christmas. Every day untill Christmas one Nook girl will host a giveaway, so make sure you stop by and check out the Nook blog daily to see who is hosting a giveaway. And today is my day!

Here is a little bit of advent calendar inspiration for you. This is an advent calendar I created this year featuring Imaginisce Santa's Little Helper, SRM stickers, Twinery twine and a lot of felt and fabric glue.


Just a quick note about making this: it looks sewn together, but it's NOT! I sewed a border around the outside of the backing, just for some definition. I also stitched around the squares of patterned paper, but I adhered them to the squares of felt with fabric glue. The felt squares are also stuck to the backing with fabric glue. So, yes I can sew, but it was SO much easier to glue it together!

I die cut the scalloped circles, and used my cricut for the circles. I probably should have used the cricut for both - that would have saved time. Set it and forget it! I made the rosettes while I was watching tv.


Ok, now onto the part you are waiting for. Here is what I am giving away - 3 15yd bundles of Twinery twine, one Bo Bunny stamp pack, one WRMK stamp and one Imaginisce stamp. I reserve the right to throw a few more random things in there when I actually find an envelope and get it ready to mail. :)


For a chance to win this, simply leave a comment here before December 10th at midnight EST. I'll do a drawing and announce the winner next week. Make sure you also hop on over to Leah Killian's blog and get entered for the grand prize sometime between now and Christmas Morning. You could win a free subscription to the always inspiring Nook kits!

Sunday, December 4, 2011

Season to be jolly card


I have been thinking up cards for the Moxie Fab medallion challenge for a while now, and procrastinating. I guess it's lucky that I did, because I saw the new sketch challenge from My Mind's Eye and it was perfect!

Here is the card:
and here is the sketch.
I used the Holly Jolly papers from My Mind's Eye, some Twinery twine, an SRM sticker, American Crafts Cardstock and some favorite findings buttons. My camera has been acting up, so this picture isn't the greatest. Unfortunately I think I am going to have to take it into the shop tomorrow. Eek! hope that doesn't cost a small fortune. Anyway, the card is embossed with a sizzix embossing folder.

I haven't done this in a while, but I actually let myself have fun and play this weekend, so I indulged in a little old fashioned challenge combining...

Saturday, November 19, 2011

Stamped Gift Set featuring Imaginisce and SRM

A couple of days ago I shared a 
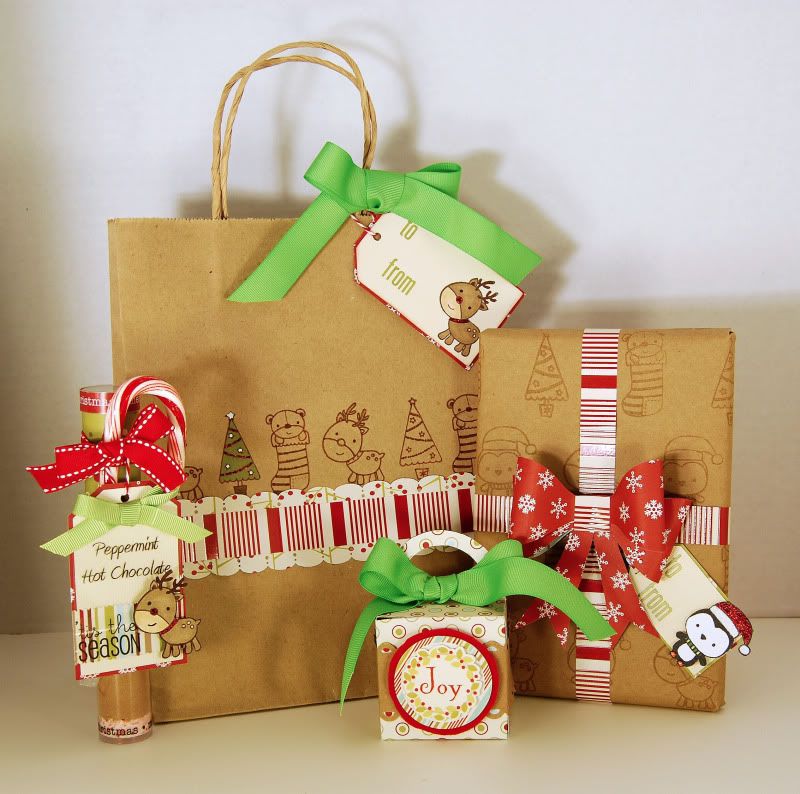
stamping tutorial and promised some more ways to use those techniques. Embossing, glossy accents, crackle accents, flock, glitter and stickles can be combined with stamps to add that extra special touch. In the tutorial I used the stamps on cards and can I just say - wow my card making has come a long way in a year! The techniques are still useful though and here I used them on tags, a gift box, wrapping paper and gift wrap.

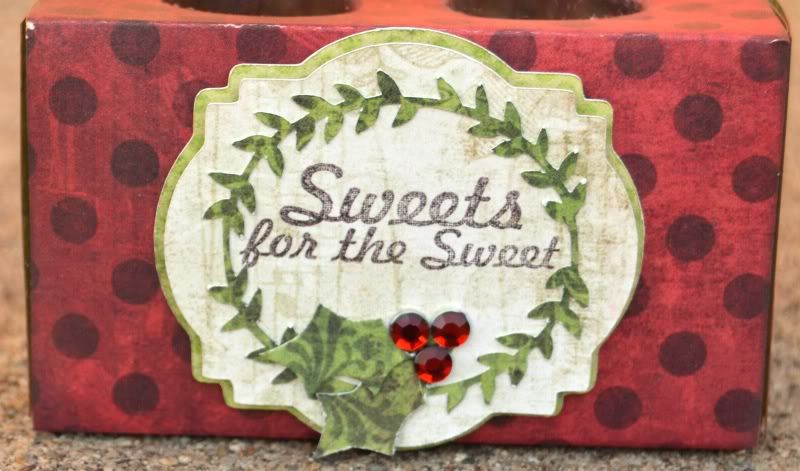
The gift box is from a printable template from Wendy Bird Designs at A Cherry On Top. These templates are awesome because they are so easy to use. You don't need any special software, just print them on the back side of the paper that you want to use, cut them out and fold on the fold lines. You can also add digital papers and print them out hybrid. Here I printed on the back of the Imaginisce Jingle All the Way paper, then added some punched kraft paper, a layered sticker accent and some ribbon.

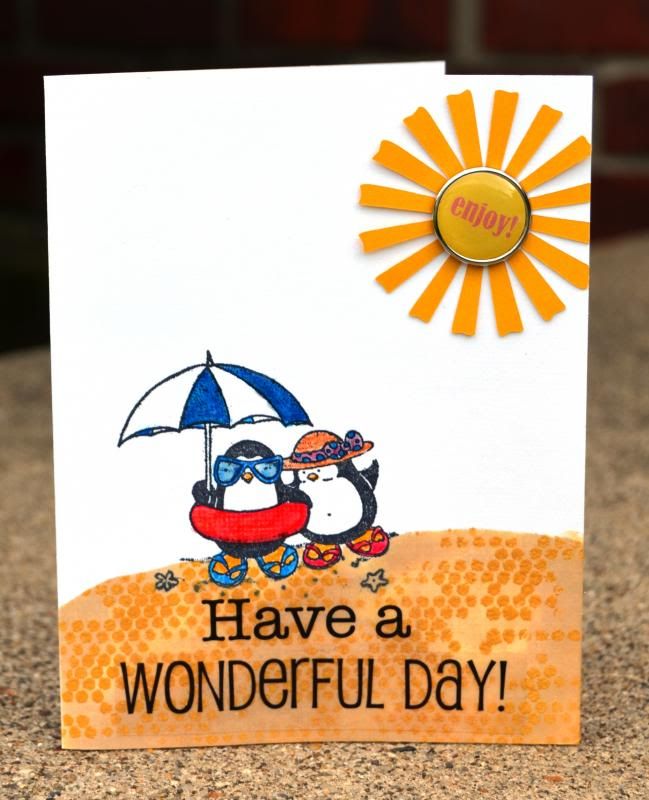
For the gift bag, I stamped a row of images with versamark ink. Then it wasnt dark enough for me, so I traced them with a fine brown pen. I colored in the one tree, just for interest, before adding the strip of papers and tying the top closed with a bow. The tag on this one has a reindeer with stickles on his nose and collar.

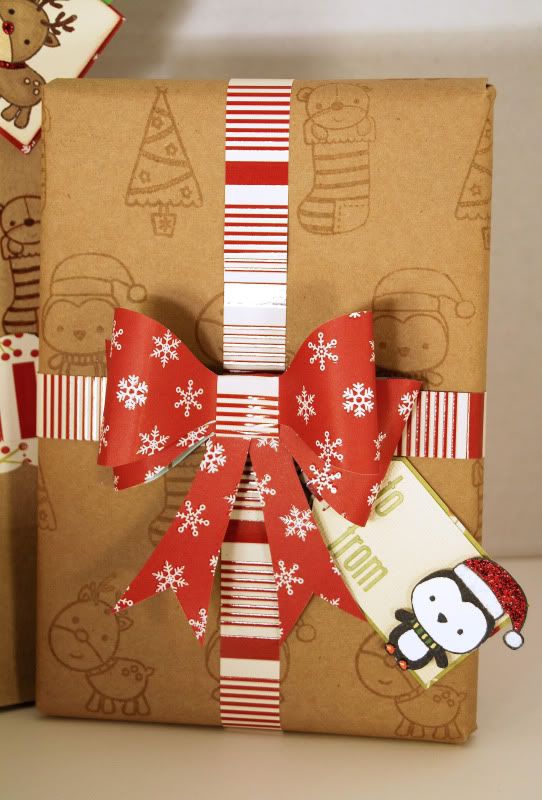
For the wrapping paper, I spread out the kraft wrapping paper and stamped the adorable little critters using versamark ink for a subtle effect. To make it easier, I arranged the 4 stamps on a large block, so I stamped all four at a time, and needed to repeat the pattern less often. Next I added some paper strips and a paper bow - who needs ribbon?! For the bow, I made a template for the loops, which you can see below. Then I copied it four times, and used glue dots to hold each loop together, and the two on each side to each other. Finally I used a strip of a contrasting paper to wrap around and hold all the loops together. The tails of the bow were just freehanded on some scrap paper. I used foam tape to adhere the bow to the package so that the bow didn't get too squished.

The penguin was stamped on white cardstock, then colored in. I then added stickles, glitter flock and glossy accents before fussy cutting it. I used more foam tape to adhere it to the tag. All the tags were cut with my Cricut. The letters are Lily Bee.

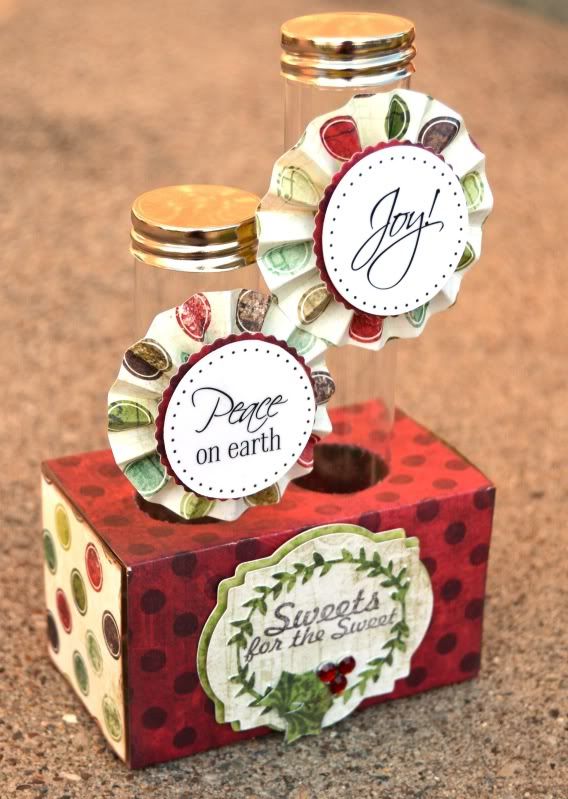
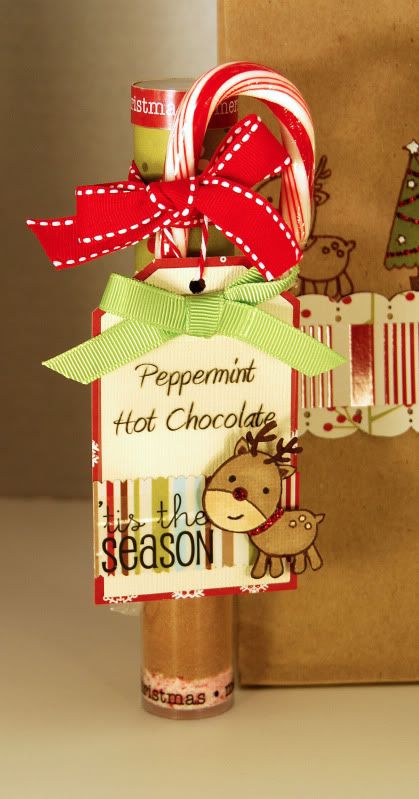
Last but not least, the tube is from SRM stickers. I filled it with layers of hot chocolate mix and crushed peppermint candies. I added some paper strips to the top, and stickers to the bottom and top. Then I added a candy cane and a ribbon, before tying on a tag. The tag features another SRM sticker, and a fussy cut Imaginisce stamped reindeer with a stickled nose and collar. Instructions are on the back of the tag.

Finally, here is the petal template for the bow. Yes, you can see the corner of a penguin stamp, this was a scrap that I had tested the stamp on, but all you really need is the outline.
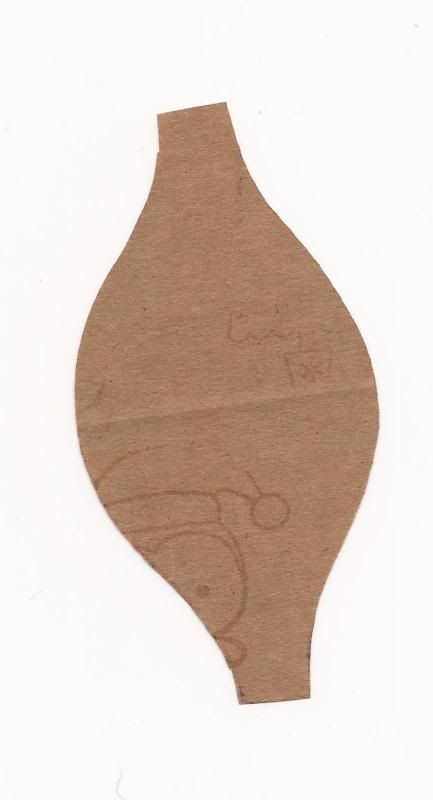
Thursday, November 17, 2011

Washi tape card in Create gallery

I am featured in the Cards magazine Create blog challenge gallery this week. I love doing these challenges. Who am I kidding, I love doing pretty much all challenges. However, I was stumped for a while on this washi tape challenge, then last night an idea just came to me!

I covered some cardstock in strips of washi tape and then die cut it to form the base of the label.
For the background, I embossed the cardstock, then swiped a versamark watermark ink pad over the embossing. I think next time I will try the clearsnap stylus because it was tough to apply from the larger ink pad.

Patterned paper, and rose brad(but I pulled the brad part off): American Crafts
Cardstock: Bazzill
Sticker: SRM
Ribbon: May Arts
Leaves: Prima
Pink paislee artisan tape
Embossing folder: sizzix

Wednesday, November 16, 2011

Scrapdango November Sugar Kit Reveal

The DT kit reveals are up at Scrapdango. You can see the rest of my reveal HERE. You can find the rest of the team members reveals along with other kit info HERE. And last but certainly not least, check out all the new challenges in the challenge forum.

For this page I used the MME paper and some Glitz from the kit along with some SRM stickers that I had in my stash, and the Bella Blvd alphas from the kit, to make a simple, but stunning page. I love how the glitter compliments the glow from the candles in the photo.